| It seems like I have been ranting and raving about finger
knitting to anyone who will listen to me.
So I thought I would give a basic finger-knitting tutorial. I have found
that there are essentially three different methods for finger knitting,
but this seems to be the easiest one to show you. The limitations are
that you are limited to 10 stitches across unless you want to rig additional
objects to increase your stitches. |
||
Click on any of the photos below
to see a larger photo! |
||
 |
 |
 |
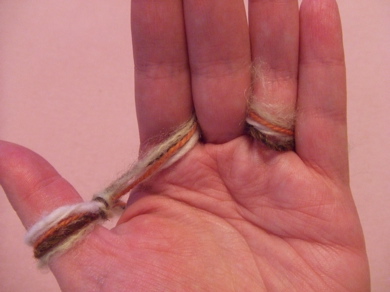
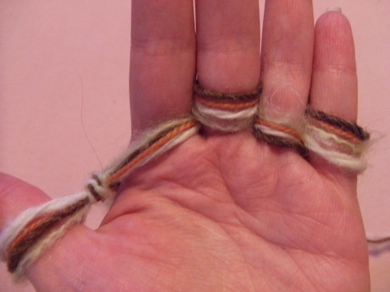
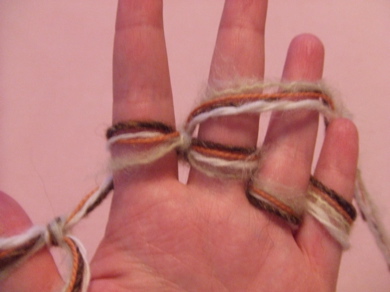
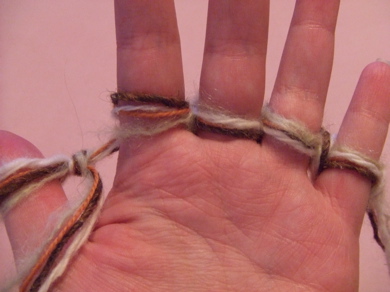
| Make a slipknot and wrap it around your thumb. Then weave the thread as pictured. | Once you hit the pinky wrap back the other direction. | You have cast on at this point. |
 |
 |
 |
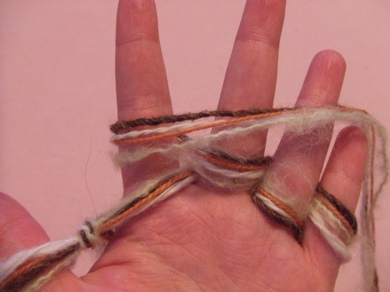
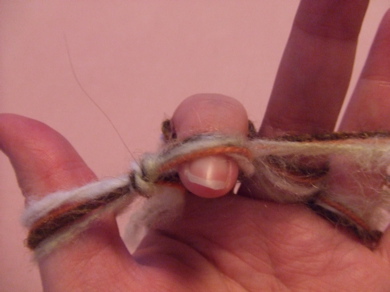
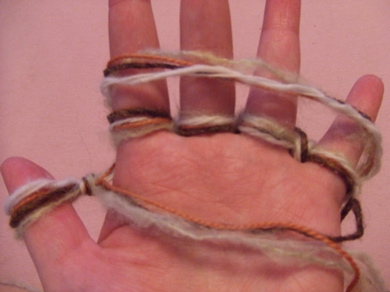
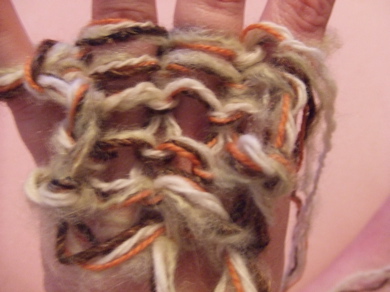
| This row only, Take the thread between the first finger and thumb and wrap around first finger to lock in the first row. | Take the loop below over your finger locking in the thread lying across the top. | Here you see the first row with the piece of thread locked into place |
 |
 |
 |
| Cross the thread now right to left and lock the stitches again. | A photo of the knitted fabric behind your fingers | A photo of the final fabric |
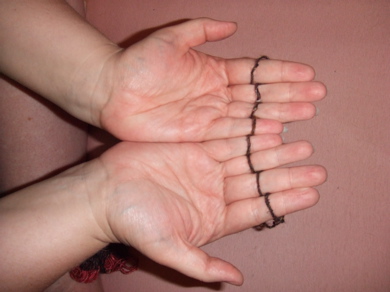 |
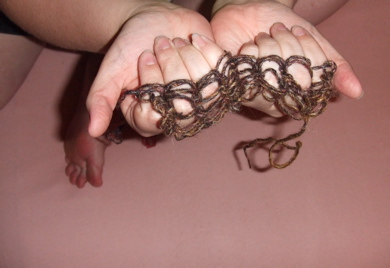 |
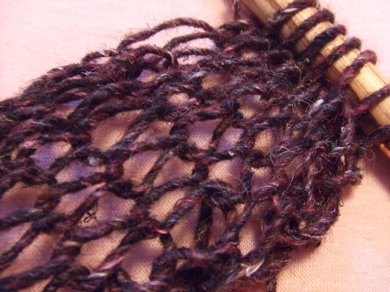 |
| 8 stitches row | Fabric hanging behind | Transferred onto a pen to hold the stitches. |
 |
||
| Here is a sneak peak at my finger knit scarf and why I have fallen in love with this technique. The yarn is very special to me, so I am super happy to have found something to show off its beauty. MG hand spun it for me last year. This was such a perfect project for it and I couldn't be happier with it. More tomorrow.... | ||
Showing posts with label knitting tech.. Show all posts
Showing posts with label knitting tech.. Show all posts
Saturday, July 14, 2007
kitty: finger knitting

Sunday, July 30, 2006
kitty: in search for the perfect size triangular winter shawl
 |
||||||
|
||||||
| The
Specs: Pattern: My own Yarn: 3 hanks banana silk from Pure Knits Needles: Size US 13 Modifications: I would keep more detailed increase records so I didn't have to rip out the other side so many times to get it even. Time: 6 hours approximately |
||||||
I have been thinking a lot about what makes the perfect lace shawl for me. Size - I think most shawl wearers prefer a shawl that is at least long enough to cover their "wingspan," the distance from one hand to the other across the top of the back. The problem arises though for the rubenesque knitter that to knit a shawl that is wide enough to cover there wingspan the length from top selvage edge to the point becomes ridiculously long. A similar problem with raglan sleeves, I may have a 50-inch bust but my arms are not 18 inches from my shoulder to the middle of the underarm. Shaping
the triangle shawl - From what I could figure out there were
several approaches for making a triangular shawl: |
||||||
 |
||||||
After much consideration, 3 above seem to be the best comprise approach for someone with a larger wingspan. You can easily increase the long edge just by lengthening the cast on and bind off area thus not having the bottom point extend past a normal shawl length in the back. So the best of both worlds enough to cover the wingspan and not destroy the shawl by setting on it. And on a side note with longer sides, if you are thinner you can do a lot of fun wrapping techniques with this design that are not usually possible with a symetrical shawl. Now the only problem
is finding intricate fun lace patterns that are designed in this style.
|
||||||
 |
||||||
| And not to forget some awesome Food Porn - Hot Spring Italian Sausage Miso - & - Amazing Seaweed paste/miso paste Cat fish that had been soaked in Italian Mineral water with Bamboo, and lotus root grilled on a sheet of seaweed, Awesome Tofu with white seasame sauces and La Zu, Seaweed Salad, and rice. Yum I tell you and I have actually lost a lot of weight with my healthy new food diet. HAPPY DAY! HAPPY DAY! | ||||||


Wednesday, July 26, 2006
kitty: Deborah's questions about the Sand Dollar Sweater
|
Thanks for stopping by and leaving your comments and questions about the Sand Dollar sweater. . Here are my final thoughts good and bad. Positives: |
Negatives a)
The sweater is designed to ride up about 2 inches in the front where the
Sand Dollar sits. So you have straight lines that point to the center, that
draw your eyes to any stomach flaws. (see photo to the right) |
 b)
The biggest problem in my opinion lies in the front two panels that attach
to the top of the Sand Dollar; I think the pattern is written about 3-4
inches to short on each side. The sweater does fit me across the shoulders,
though the back is pulled tight. This causes a huge bulk of fabric that
has no room to lie down. There ends up at least on me, about 4 inches of
fabric that sits at the neck. It just looks bad and more over incredibly
uncomfortable. Had it been longer I would have added 2 inches on top of
the shoulders and an extra 1-2 inches across the back. There is more than
enough fabric in the sleeves to take up the extra 2 inches so that wouldn't
be a problem. |
|
c) The sweater is really boxy, maybe my yarn was to stiff, but I just didn't get the elegant drape of the model in the picture, even when it was on the dress form. If I were to redesign
it; What is so hard about this sweater for me is that I do love the picture in the book. But after trying on the sweater it made me think of a comment that Maggie Jackson (Maggie's Ireland fame) made in a class I took. She talked about the fact that a lot of the models in her books have no backs or are left totally open. Placing models against walls or trees hides a multiple of sins. So I wonder if the neck on the model sweater just wasn't finished. I don't see how the pattern that is written can lay down that flat on a human being and have the elegant drape. I couldn't even get it to drape like the photo on a dress form. So, the sweater will go swimming... It hasn't yet since I hate to frog with a passion, but one brave evening it will be gone. The sand dollar may be saved since it is such a cool idea and pattern. Hope this helps a little. I hate to say it but, I wouldn't recommend the pattern in the largest size at the end of the day. Could it be fixed, yes, but probably more time than I want to spend on it. I did learn alot about construction for this sweater so not a complete lost. Kitty Kitty |
 Hi
Deborah,
Subscribe to:
Posts (Atom)


