A few weeks ago, I aimed Olga in somewhat of a knitting breakdown. I told her that I was contemplating burning all of my yarn and giving up knitting. (Ok, it was a bit dramatic I admit it, but I had spent 3 hours looking for a yarn I knew was in the stash only to find I had no idea how much yarn was on the cones. There were three garments I wanted to make and I could find nothing.) I had, had it. I did come to my senses after she calmed me down. So I just picked up the green jungle cashmere and did a swatch / figured the numbers and started to knit. I really had no idea what it was going to be. I just wanted ridges. But more importantly I needed something for itchy fingers. So after I had finished the body, I started to think about what the sweater wanted to be. So here are my thoughts and design processes I have been working on. |
||||||||||
 |
||||||||||
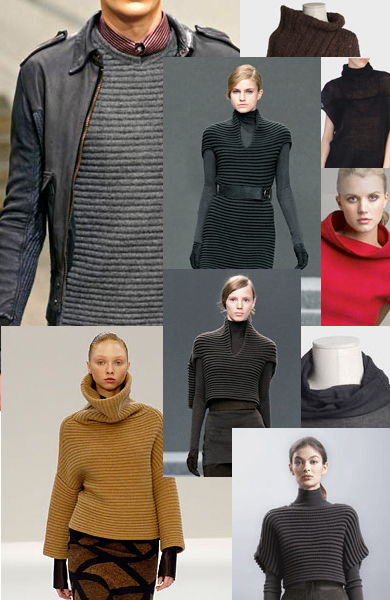
| Mihara Yasuhiro '07, Akris Fall 2008, Akris Fall 2008, Akris Fall 2006, Akris Pre-fall 2008 Disel '08, Dondup, Martin Margiela '08, MARC by Marc Jacobs '08 (All Photos were from style.com, yoox, Net a Porter) | ||||||||||
Bloggers: Virtuaalisilmukat - Harmaa pusero (Raverly link) |
||||||||||
Commercial Patterns: TWEEDY ALPACA Ridged Tee Shirt - Tahki Stacy Charles Inc (Thaki Tweed 2nd Edition) |
||||||||||
Inspirational Stitches - |
||||||||||
 |
||||||||||
|
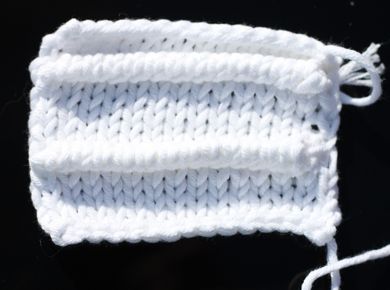
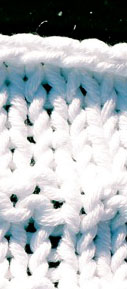
One of the popular stitches you see in a lot of the Akris sweaters is the loop stitch. Which gives a raised ridge to the design. Loop Stitch - The first one is worked 3 rows and the second one is worked 5 rows Beginning with the RS row, work 5 rows of stockinet stitch (Knit on the RS and Purl on the WS). Making sure not to work the first stitch or the last stitch of the row. Just work between those two stitches of the row since you will be creating your loop on that row. 1) Close the loop Note: if you are having problem keeping on the right row, Knit the first row of the pattern with a piece Method two Beginning with the RS row, work 5 rows of stockinet stitch ( Knit on the RS and Purl on the WS) Making sure not to work the first stitch or the last stitch of the row. Just work between those two stitches of the row since you will be creating your loop on that row.
Note: if you are having problem keeping on the right row, Knit the first row of the pattern with a piece
|
||||||||||
 |
||||||||||
|
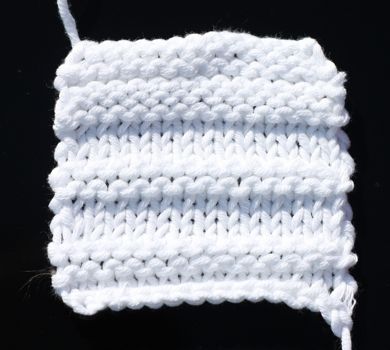
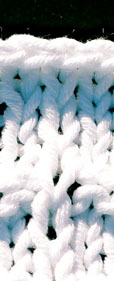
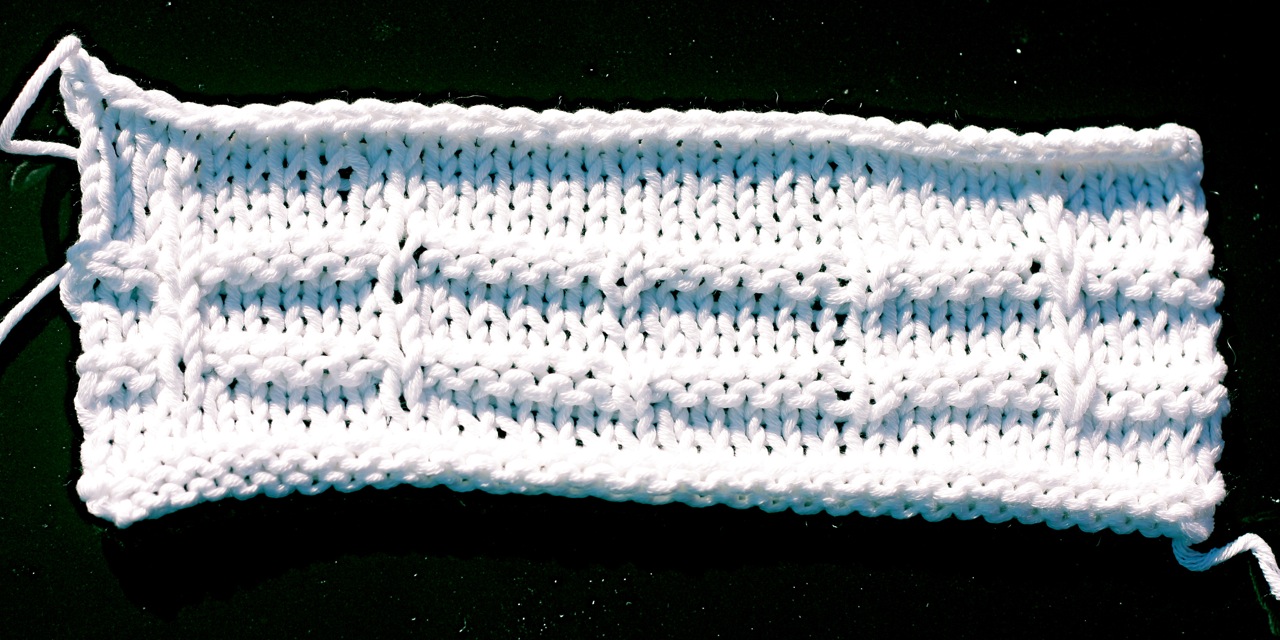
Several of the designs that I looked at for inspiration just had a simple Garter Stitch stripe. The old Adrian Vittadini Sweaters during the early '90's were done with 4*4 ribbing. Garter Stitch Ridges - This is done by essentially knitting 4 rows of stockinet and 2 rows of garter. |
||||||||||
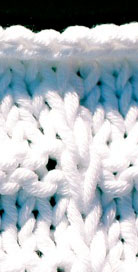
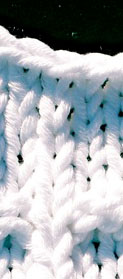
Fake Seams - |
||||||||||
 |
||||||||||
Larger View Right to left The Big problem though with any striped garment is that you have to deal with the jog at the start of the row. So I did a test of several types of fake seams |
||||||||||
|
Saturday, September 06, 2008
kitty: thoughts of the design processes

Subscribe to:
Post Comments (Atom)


Burn all your yarn--how could you even contemplate something so drastic? I am certainly glad that you rethought the frustration and took it all out on a mad series of swatches. I hope the finished garment will be posted soon!
ReplyDeleteLove, love, love Akris! Fell for it this summer when I wandered into the Akris store in Frankfurt earlier this year.
ReplyDeleteThanks for the fake seam tutorial - useful for us and I assume it saved your stash...
gorgeous images and very impressed with the level of your research and preparation!
ReplyDeletewow. and so worth it - your end result is fantastic.
still ogling this knit of yours! :)
ReplyDeleteand looking in to this version:
http://www.ravelry.com/projects/SheBakesCakes/stehkragen-rolli-im-stil-von-akris
and the free pattern here:
http://www.fuer-sie.de/mode/strickanleitungen/strick2007/pulli05.html
any thoughts or tips?
your comments are greatly appreciated. :)
kirstenxx
sorry - email:
ReplyDeleteassemblage @ optusnet[dot]com[dot]au